The basic TIF as well as all the Overviews are tiled (Cut into small squares). This allows the fast loading of a part of image.
In general, we choose Tiles of 256 Pixels and overviews of /2x.
On the treatment of the pixels, options of compression, passage of 16bits in 12 or 8 bits and a scale of color is proposed.

(D 01) This box provides the elements allowing to name the processed file according to the starting file.
The '%U' is replaced by the original disk drive, the '%R' by the original directory, the '%N' or '%s' by the original file name.
(D 02)With the (D 01) step completed, set the files to be processed in the (D 02)
It is possible to edit this file list window see, through copy/paste use the editor of your choice to improve this list of files to be processed.
Each line must be of the form: "Location of the starting file Location of the processed file ;PARAMETER1=Value ;;PARAMETER1=Value ".
The file names cannot contain ';' .
Possible parameters :
- RANGE_COLOR=1,7000 >> The starting file has a color value between 1 and 7000. The value 7000 will become 254 in 8bits or 65534 in 16bits
(D 03)The value of '256' or '512' is a good compromise.
In the case of terrestrial photos we will rather put '64' to properly take into account the deformation of the lens. Indeed, the calculation of the calibration is done only at the top of each tile, inside the tiles, the interpolation is linear.
(D 04) It is possible to compress the result files. This has the advantage of reducing the size and, when the images are on the network, to accelerate the transfer of data.
The counterpart is that the image is slightly degraded and that we can no longer modify it partially without rewriting the entire image (case of ORTHOPHOTO)
In general, the best compression is the compression 'JPEG_YC'. It is then necessary to inform the quality of the original image (D 05) and the Overviews (D 06) .
(D 07) The option generally chosen is '/2x'. The first Overview will be 1 pixel in 2, i.e. 4 times smaller than the original; the next one will be 16 times smaller and so on.
All Overviews are set to 8 Bits (1 Byte per pixel color)
(D 08) How to store pixels.
It is common to have to process the original images, mainly in the case of 16bit images. Either for reasons of size, we want to go from 16bits to 8bits, or because the images are not true 16bits.
A true 16bits image must have color components that go from 0 to 65535. The cases where this range of colors is restricted are frequent.
The following options are possible:
Origin to 8bits : Whatever the Origin file is, the result file will be in 8 BitsOrigin
to 16bits : If the Origin file is in 12 or 16 bits, the result file will be in 16 bits (or 12 if compression); otherwise 8 bits.
The Range to 8bits or 16bits options are more powerful. They use the information Min and Max color value provided in (D 09) to convert them to 8 or 16 bit range.
The calculation of the min and max values of this color range can be calculated by the (D 10) function especially in the case of using ADS80 type camera
Options PmsRgb Table to 8 or 16 bits. This option allows a color conversion according to a table that allows to describe for each starting color, the resulting color.
This table can come from the export of the Orthophoto module or from the module managing the stereoscopy color corrections (Gamma, Brightness, Contrast...)
It is in ASCII and can be made with a text editor. Its format is described at General Color Correction in Orthophoto
(D 11 ) This option allows you to force the production of 'BIG TIFF' type files that can exceed 4 Giga
This option is enabled anyway if the image size of the new files exceeds 2.5 Giga.
(D 30) This option allows you to save or restore the parameters and the list of files to be processed in a single CLICKThe
storage file is: ..\PMS3DINIRasterConvert.INI
(D 31) This option allows you to save or restore the parameters and the list of files to be processed in a file of your choice
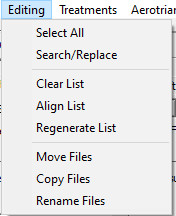
(D 50) To select the whole list of files. You can copy this list to the clipboard by pressing [CTRL]+C.
(D 51) Brings up the Find/Replace dialog box for working with this list of files.
(D 52) Manipulation of this list of files. Complete deletion, alignment of the presentation or reorganization of the result files.
(D 53) This list is used to apply system functions such as copying, moving or renaming files.
(D 15 ) To stop any treatment in progress.
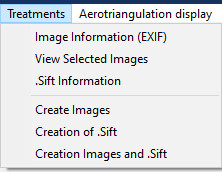
(D 70 ) For information on the list of Images or the corresponding .SIFT files if they are already created.
(D 71 ) To start the image or .SIFT creation process or both on this file list
Considering the large size that the '.TIF' Image Files can have, It is advisable to process them with a 64bit version of RasterConvert (RasterConvert20__x64.EXE), this will avoid crashes due to a lack of memory.
Instead of processing the ".TIF" files, we need to process the ".SUP" files. This will rename the files with shorter names.
The Tif files affected by this ".SUP" file will be merged, tiled and contain the image pyramids.
The Camera (.CAM) and Trajectory (.ODF) files will also be renamed and copied to the Final directory.
To find this Range, use the Button (D 10) Calculation Range.
After a few minutes of calculation, stop the program with the button STOP (D 15).
Add 5 to 10% to the value found. This value must be found for each camera.
This value can be added as a parameter to each Processing Line ( ;RANGE_COLOR=1,7000 )
The window (D 02) will contain something of the Form :
O: /GeoBretagne_ADS80-RGB-L93/L1_1313_110820_095419_PANB14AL1.sup P: /CG35/001_P14.TIF; RANGE_COLOR = 1,7000
O: /GeoBretagne_ADS80-RGB-L93/L1_1313_110820_095419_PANF02AL1.sup P: /CG35/001_P02.TIF; RANGE_COLOR = 1.7000
O: /GeoBretagne_ADS80-RGB-L93/L1_1313_110820_095419_RGBN_00L1.sup P: /CG35/001_RGB.TIF; RANGE_COLOR = 1.5600
O: /GeoBretagne_ADS80-RGB-L93/L1_1313_110820_104215_PANB14AL1.sup P: /CG35/002_P14.TIF; RANGE_COLOR = 1.7000
O: /GeoBretagne_ADS80-RGB-L93/L1_1313_110820_104215_PANF02AL1.sup P: /CG35/002_P02.TIF; RANGE_COLOR = 1,7000
O: /GeoBretagne_ADS80-RGB-L93/L1_1313_110820_104215_RGBN_00L1.sup P: /CG35/002_RGB.TIF; RANGE_COLOR = 1.5600
- It contains files:
- "---.SUP" ;transformation data from the local LPS system to the Geographic system
- "---.ODF" ; trajectory data. GPS_Time,X,Y,Z,Phi,Omega,Kappa for each line of the Image file
- "---.TIF"; the tiled image with its pyramids in a Big-Tiff format (Tiff format that can exceed 4 Giga of data)
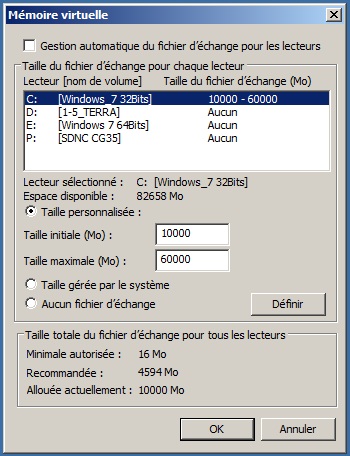
When making .TIF files with Pyramids, it is necessary to have a large computer cache and enough disk space to store the Overviews (Pyramids) temporarily.
These temporary files are put in "C:/TEMP" by default. To change this folder, change or add in the file "..\INI\PMS3D.INI or [.DEF] the parameter:
[GENERAL]
TEMP_DIR=C:/My_Temporary_Directory
It is also necessary to check that there is enough cache memory on the computer.
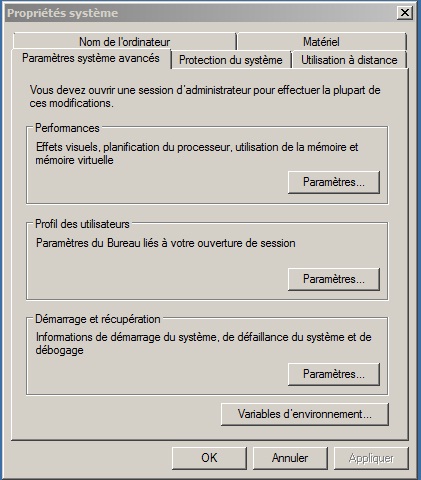
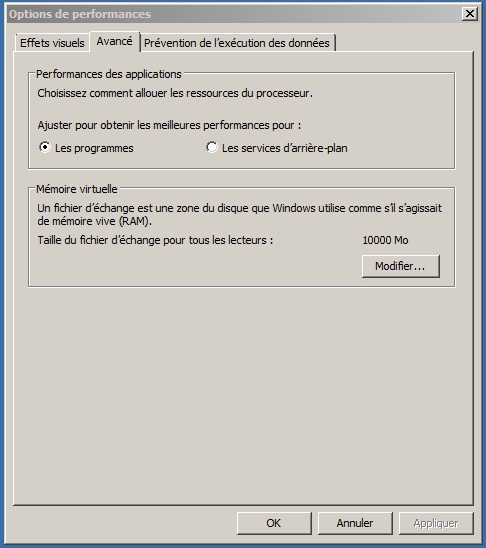
These settings are reached through a series of menus:
System Control Panel Advanced Settings (Performance [SETTINGS]) :